
A Closer Look: Applying Incontinence Products
You will find that there are many types of absorbent products available for bladder leakage protection, and each one designed for different levels of incontinence. However, choosing the right protection is one thing, applying it correctly is another. In this article, we will dive deep into the application process, discuss key differences between products, and share resources that can help users of any age.
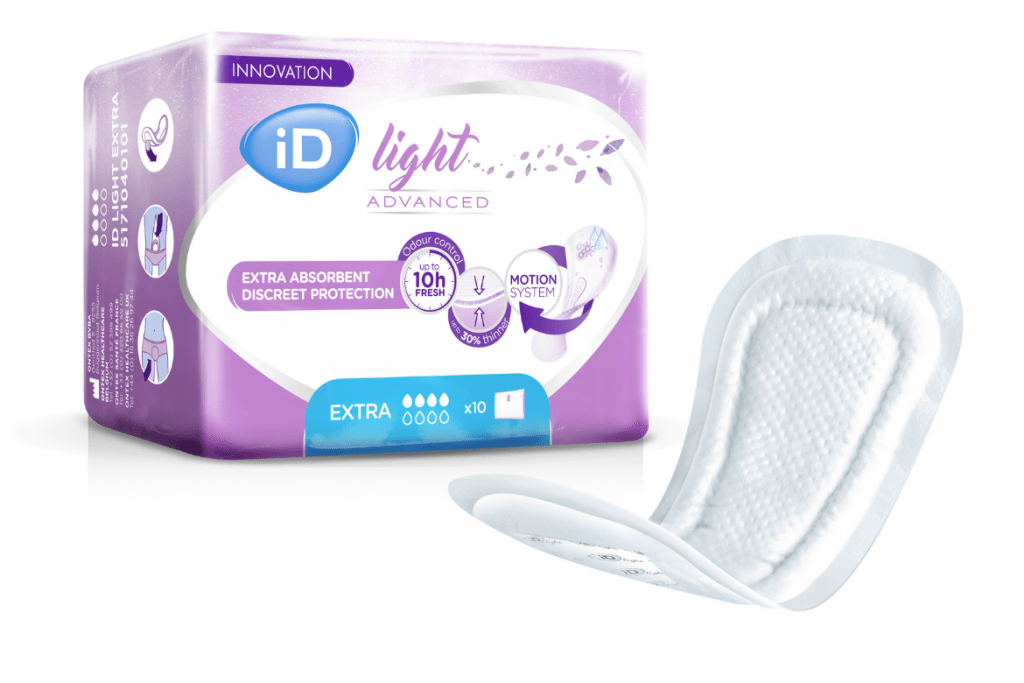
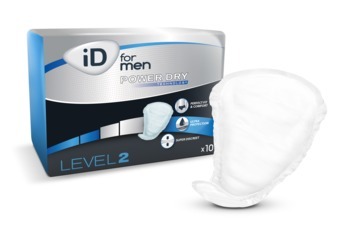
Pads for small leaks (little discomforts)
These pads are recommended for people…
- …with few irregular or regular drops
- …who can stand, move, and engage in physical activity without assistance.
- …who want a discreet way to manage their issue
iD manufactures these pads for men and women, each designed to meet specific anatomy needs. The products are thin, light, and odour-free, they take the shape of underwear for a natural feel.
Applying iD Incontinence Pads
iD Light pads are similar to women’s menstrual pads. Same goes for the iD for men pads that are designed more like male guards. To use them, just do the following:
- Unfold the pad. Remove the paper from the adhesive strip.
- Position the pad so that the leaks fall on the central area of the pad.
- If using iD for Men, ensure that the wider part of the product is at the front.
- Stick the pad inside the underwear, the pads come with an adhesive strip on the back
- Pull the underwear up and adjust for comfort and security.

Protection for heavier Bladder leakage (weak bladder)
These products are recommended for people…
- …with significant leaks or greater leakages with more regular accidents
- … who can stand, move, and engage in physical activity without assistance
- …who want a discreet way to manage their issue
iD manufactures Absorbent Underwear and Shaped pads for this type of need.
a) Absorbent Underwear
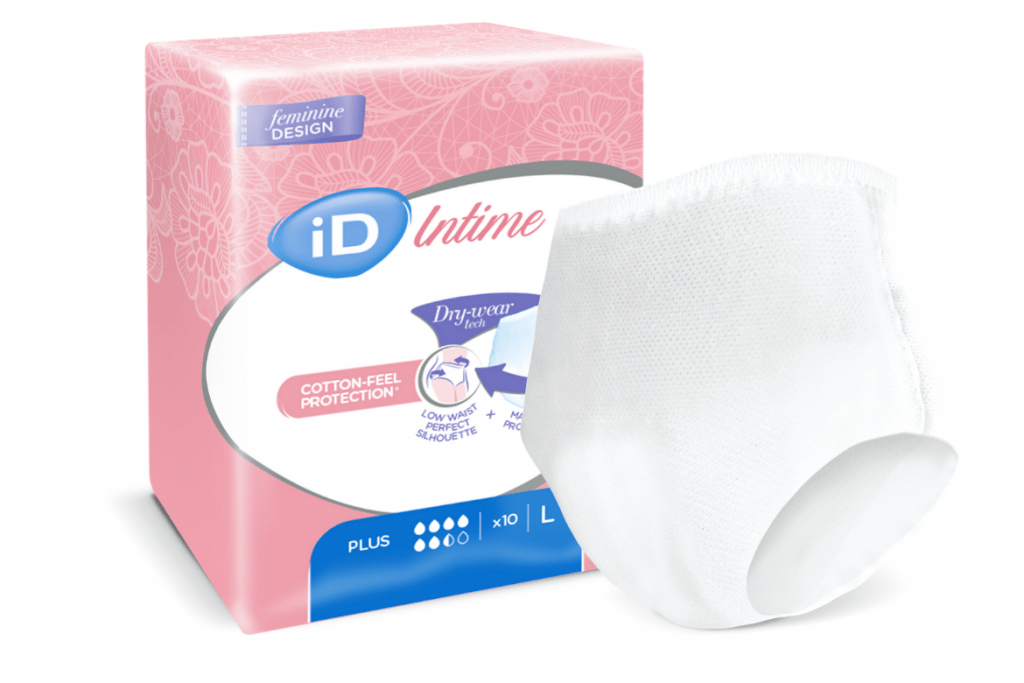
iD has two protection underwear ranges, iD Pants and iD Intime. With a latex-free design and a cotton feel, they are designed to give patients a real-underwear feeling.
Applying iD Absorbent Underwear
Not surprisingly, applying iD Pants and iD Intime is similar to pulling on traditional underwear.
- Ensure that the waist size indicator is at the back of the Pants or Intime underwear.
- Step into the underwear and pull them up.
- Adjust the underwear for comfort and security.
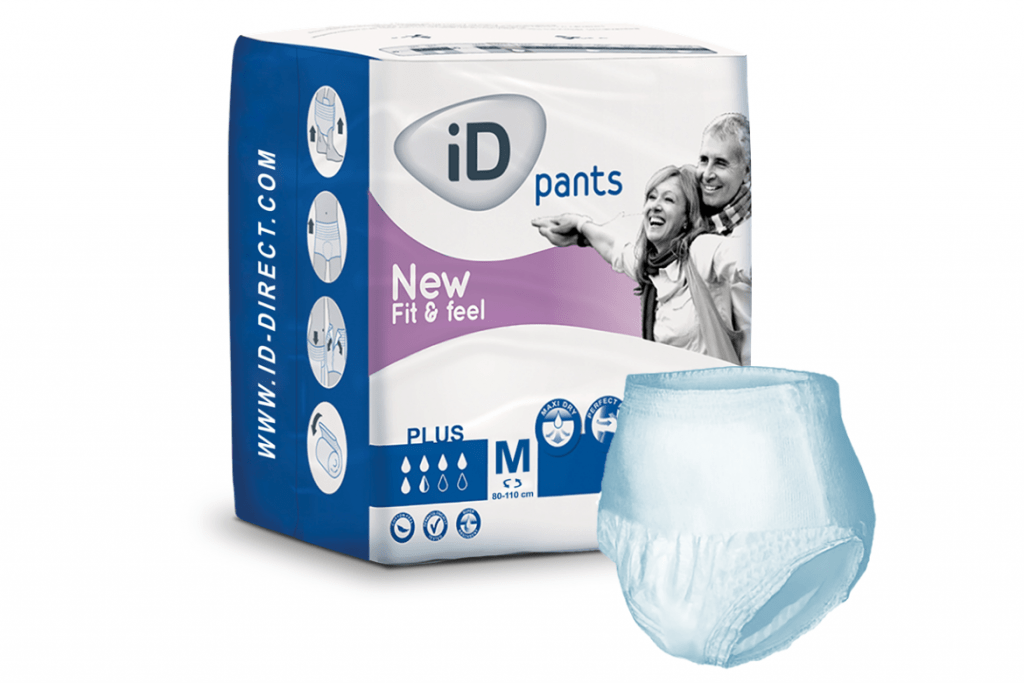
Pull-on underwear’s relatively simple application process makes it attractive to those looking for a quick change. Nevertheless, iD underwear protection offers a limited sizing range that may not work for all patients.
b) Form or Shaped Pads
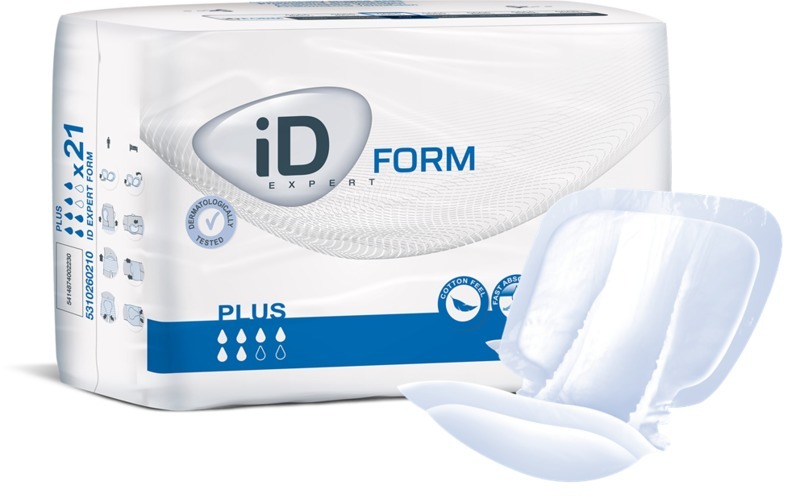
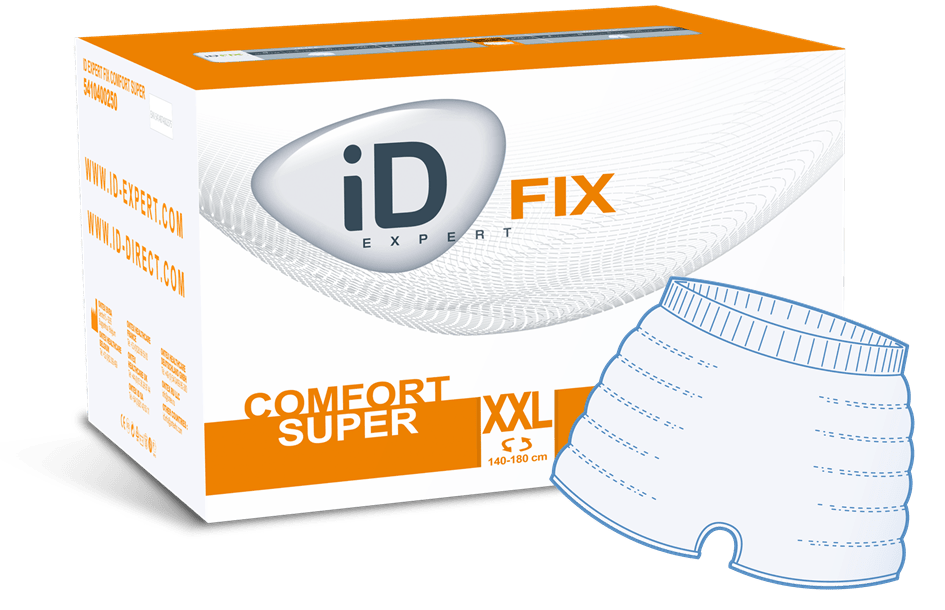
iD Expert Form works best for heavier absorbency needs. Because the shaped pad is thicker and wider it needs to be worn with iD Expert Fix underwear as it can hold it correctly. Its design also allows for application in both standing-up and lying-down positions. To use iD Expert Form, refer to the steps below:
Standing Up Application
- Pull the iD Expert Fix underwear to the mid-thigh. Turn the waistband down toward the knees.
- Unfold the pad.
- Fold the pad in half lengthways. Channel it with your fingers. This activates the anti-leak cuffs.
- Pass the pad between the legs from front to back. Use the wetness indicators as a guide to centre the pad.
- Fan out the front and the back of the pad horizontally to create a channel shape between the legs. Smooth out the product.
- Pull up the iD Expert Fix underwear. If needed, adjust for comfort and fit.
Lying Down Application
- Pull the iD Expert Fix underwear to the mid-thigh. Turn the waistband down towards the knees.
- Open and unfold the pad. Remove the paper from the adhesive strips.
- Fold the pad in half lengthways. Channel it with your fingers. This activates the anti-leak cuffs.
- Gently roll the patient onto their side. Bend their knees to create a channel between the legs.
- Pass the pad between the legs from front to back. The smallest area of the pad should be at the front.
- Fan out the front of the pad. Make sure that the anti-leak cuffs stay activated.
- After placing the pad, pull up the iD Expert Fix underwear. If needed, adjust for comfort and fit.

Heavy loss & Medical Incontinence issues (true incontinence)
iD manufactures a range of heavy incontinence protection to suit all the needs. The range includes iD Expert Slip, iD Expert Belt, and iD InnoFit®. They are designed so they can be worn both in standing or lying down positions. In this section, we will discuss both.
a) iD Expert Slip & iD Innofit
Standing Up Application
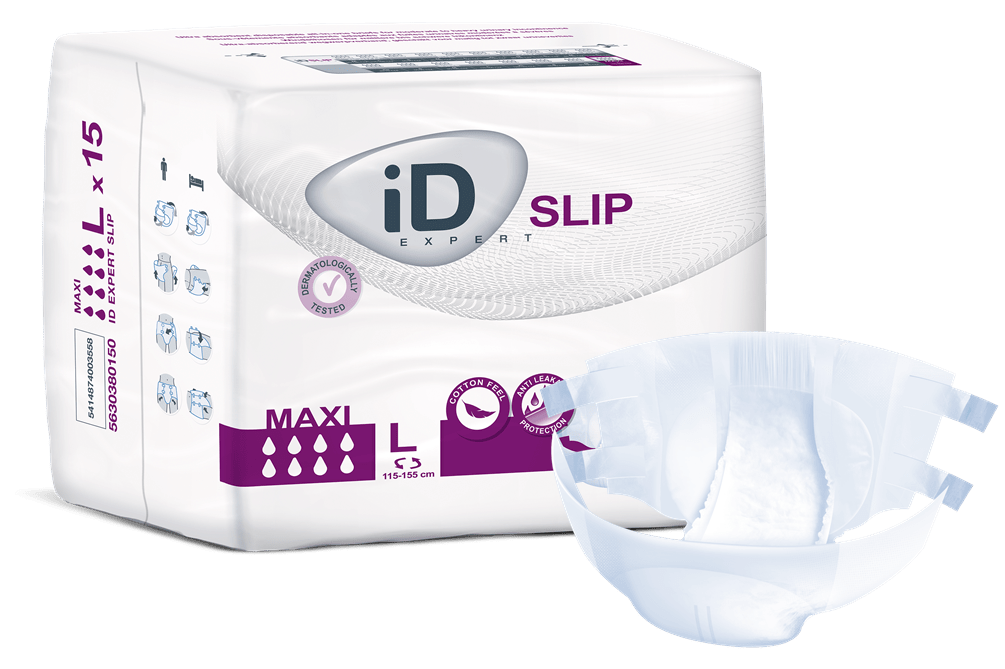
For the iD Expert Slip and iD InnoFit®, refer to the following steps:
- Fold the product in half lengthways. Run your fingers underneath the back sheet. This activates the waterproof leg barriers.
- Pass the product between the legs from front to back. Fan out the ends, making sure that the top rear end is positioned at the tail bone. Make sure that the end with fixation tapes is placed at the back.
- Fix the bottom tapes in an upward position. This ensures a secure fit around the legs.
- Fix the top tapes in a downward or horizontal position. This ensures a secure fit around the waist.
- Check for comfort and fit. Re-fasten and re-adjust tapes if needed.
- For visual assistance, check out this instructional video for the iD Expert Slip.
Lying Down Application
For iD Expert Slip and iD InnoFit®, do the following:
- Fold the product in half. Run your fingers underneath the back sheet. This activates the anti-leak cuffs.
- Using the wetness indicators as a guide, centre the pad and fan out the back.
- When you have centred the pad at the patient’s back, encourage the product between the patient’s legs.
- Roll the patient onto their back and gently pull the product up through the legs. Ensure that the anti-leak cuffs remain activated, then fan out the front of the product.
- Fix the bottom tapes in an upward position. This assures a secure fit around the legs.
- Fix the top tapes in a downward or horizontal position. This assures a secure fit around the waist.
- Check for comfort and fit. Re-fasten and re-adjust tapes if needed.
- For visual assistance, check out this instructional video for the iD Expert Slip.
b) iD Expert Belt
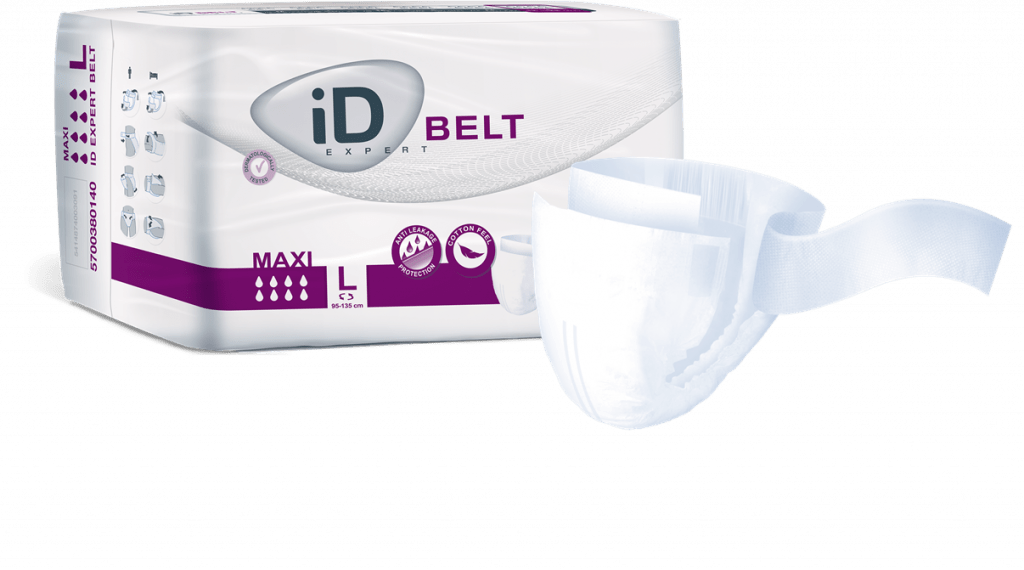
The iD Expert Belt differs in that it uses a belt, rather than fasteners, to secure the underwear into place. If using the iD Expert Belt, refer to the following steps:
Standing Up Application
- Unfold the product. Open it first from right to left, then from left to right.
- Halve the pad lengthways and run your fingers underneath the back sheet. This activates the anti-leak cuffs.
- Stand next to the patient. Fasten the belt around their hips using the Velcro tabs.
- Bring the pad upward between the legs. Take care to maintain the cupped shape.
- Pull out the front end of the pad until it is completely open. Secure both ends of the front end of the pad to the belt using the two Velcro fastenings.
- Ensure the pad is fitted securely and comfortably between the legs.
- For visual assistance, check out this instructional video.
Lying Down Application
- Unfold the product. Open the product from right to left, and then from left to right.
- Fold the product in half. Run your fingers underneath the back sheet. This activates the anti-leak cuffs.
- Gently roll the patient onto their side. Insert the product between the patient’s legs from front to back.
- Smooth the pad at the lower abdomen and buttocks, then fasten the belt around the patient’s hips.
- Gently roll the patient onto their back. Using the wetness indicators as a guide pull the pad out at the front. Take care to maintain the channel shape.
- Secure the front ends of the pad to the belt. Ensure that the product fits securely and comfortably between the legs.
- For visual assistance, check out this instructional video.
At iD, our mission is to offer discreet solutions for a life in full view. Check out our full range to see what our products have to offer.
3 Comments
Oh i need light leaks
Oh these look good i would need the light leaks as i use tenalady
I have been fully incontinent for more than 20 years and still fully mobile and work in the assembly area. For years I have been following how the products offer less and less security, but supposedly are supposed to become more and more comfortable for those affected. Furthermore, as on their website, you can find wrong advice from my point of view regarding the handling of the diapers when putting on while standing.
1. You can touch the inner surface of an unused product with washed hands without worrying. It is not a sterile wound dressing, any more than children’s diapers. So you should straighten the inner cuffs, if any, with your hands before putting them on.
2. The folding of the absorbent body is completely counterproductive, as this makes the absorbent core brittle when you wet it in, which is reinforced by the ever thinner absorbent body, especially when you are fully active.
3. A diaper, like a template, not to mention templates with a waistband, is not only put on when lying down but also when standing from the back to the front, because when putting on the diaper you pinch the diaper between the back and the wall and then completely relax the front part between the legs, whereby the shell shape forms independently depending on gender and the front part is then spread out in the hip / stomach area and fixed there with fasteners. Finally, the side cuffs should simply be checked in the entire leg area and, if necessary, correctly applied.
4. When changing the diaper, the reverse order is desirable, especially in the case of fecal incontinence, but not necessary from a medical point of view, since the bacteria and viruses contained in the stool do not pose a threat to the immune system of the person concerned, but rather are part of it. If it were not as even so-called medical experts have always been supposed to claim, bleeding hemorrhoids, for example, would be life-threatening because they are permanently in contact with these bacteria and viruses and thus get into the bloodstream, which leads to sepsis but shouldn’t do. (Proven a million times) This incontrovertible fact was also confirmed to me by my urologist, who also confirmed to me that the claim that women suffer from cystitis more often than men due to their anatomically closer location to the anal area and the resulting higher risk to get sick from its germs is simply wrong. The bacteria that cause the bladder infection are not the same as those in the anal area!
I would be happy if manufacturers do not make any claims that unscientific findings have come about and that even nursing staff fall for it en masse, see breathability.
1. Breathability = evaporation = cold.
2. Breathability = odor permeability (fecal incontinence)
3. Breathability = clammy pants + damp spots on seating
4. Moisture-permeable side wings = the diaper leaks in the side position = additional bed protection + wet sleeping clothes or more complex protective measures such as e.g. Protective pants
5. Breathability = new material for diaper production + new machines because of process change
6. Breathability = more expensive diapers
7. Breathability = less leakage protection = poorer wearing comfort = greater insecurity = less comfort
Why does NO ONE speak to those affected and simply ask them what they consider to be the most important criteria for a diaper?
Why are tests carried out clandestinely in some facilities where those affected do not have a say and where a large part is immobile?
There is a very large group of people who have problems similar to mine, but who are never asked. Why not?